Introduction
In the fast-paced world of software development, efficiency and speed are crucial. Container based applications are one of the fastest ways to build scalable applications that we can develop on the cloud. Microsoft Azure provides an easy way to deploy these containerized applications using ready services for managing your docker instances and deploying them quickly. This guide will provide a step-by-step walkthrough on deploying a Docker containerized application using Azure Container Registry (ACR) and Azure Container App.
Pre-requisites
Before diving into the deployment process, you'll need the following:
-
An Azure account
-
Azure Container Registry (ACR)
-
A resource group in Azure
-
Azure CLI installed on your local machine
-
A Docker image with amd64 architecture, created and tested locally
Roles Required
The deployment process requires you to have specific roles assigned in Azure:
-
Azure Container Registry delete, push, pull permissions
-
Container Apps Contributor Role
Ensure you have these permissions before proceeding.
Build and Push Your Image
1. Login to Azure AD Using CLI:
Authenticate with Azure to ensure you have the required access.
az login --tenant <tenant\_id>
2. Login to ACR:
This command allows your Docker client to access your Azure Container Registry.
az acr login --name <registry\_name>
3. Tag Your Docker Image:
Tagging your image correctly is vital for the next step - pushing it to the registry.
docker tag <service-name>:<version> <registry-name>.azurecr.io/<service-name>:<version>
4. Push the Image to ACR:
Now, upload your image to ACR with the docker push command.
docker push <registry-name>.azurecr.io/<service-name>:<version>
Deployment on Azure
1. Navigate to Azure Portal:
Log into the Microsoft Azure Portal and find the Container Apps service.
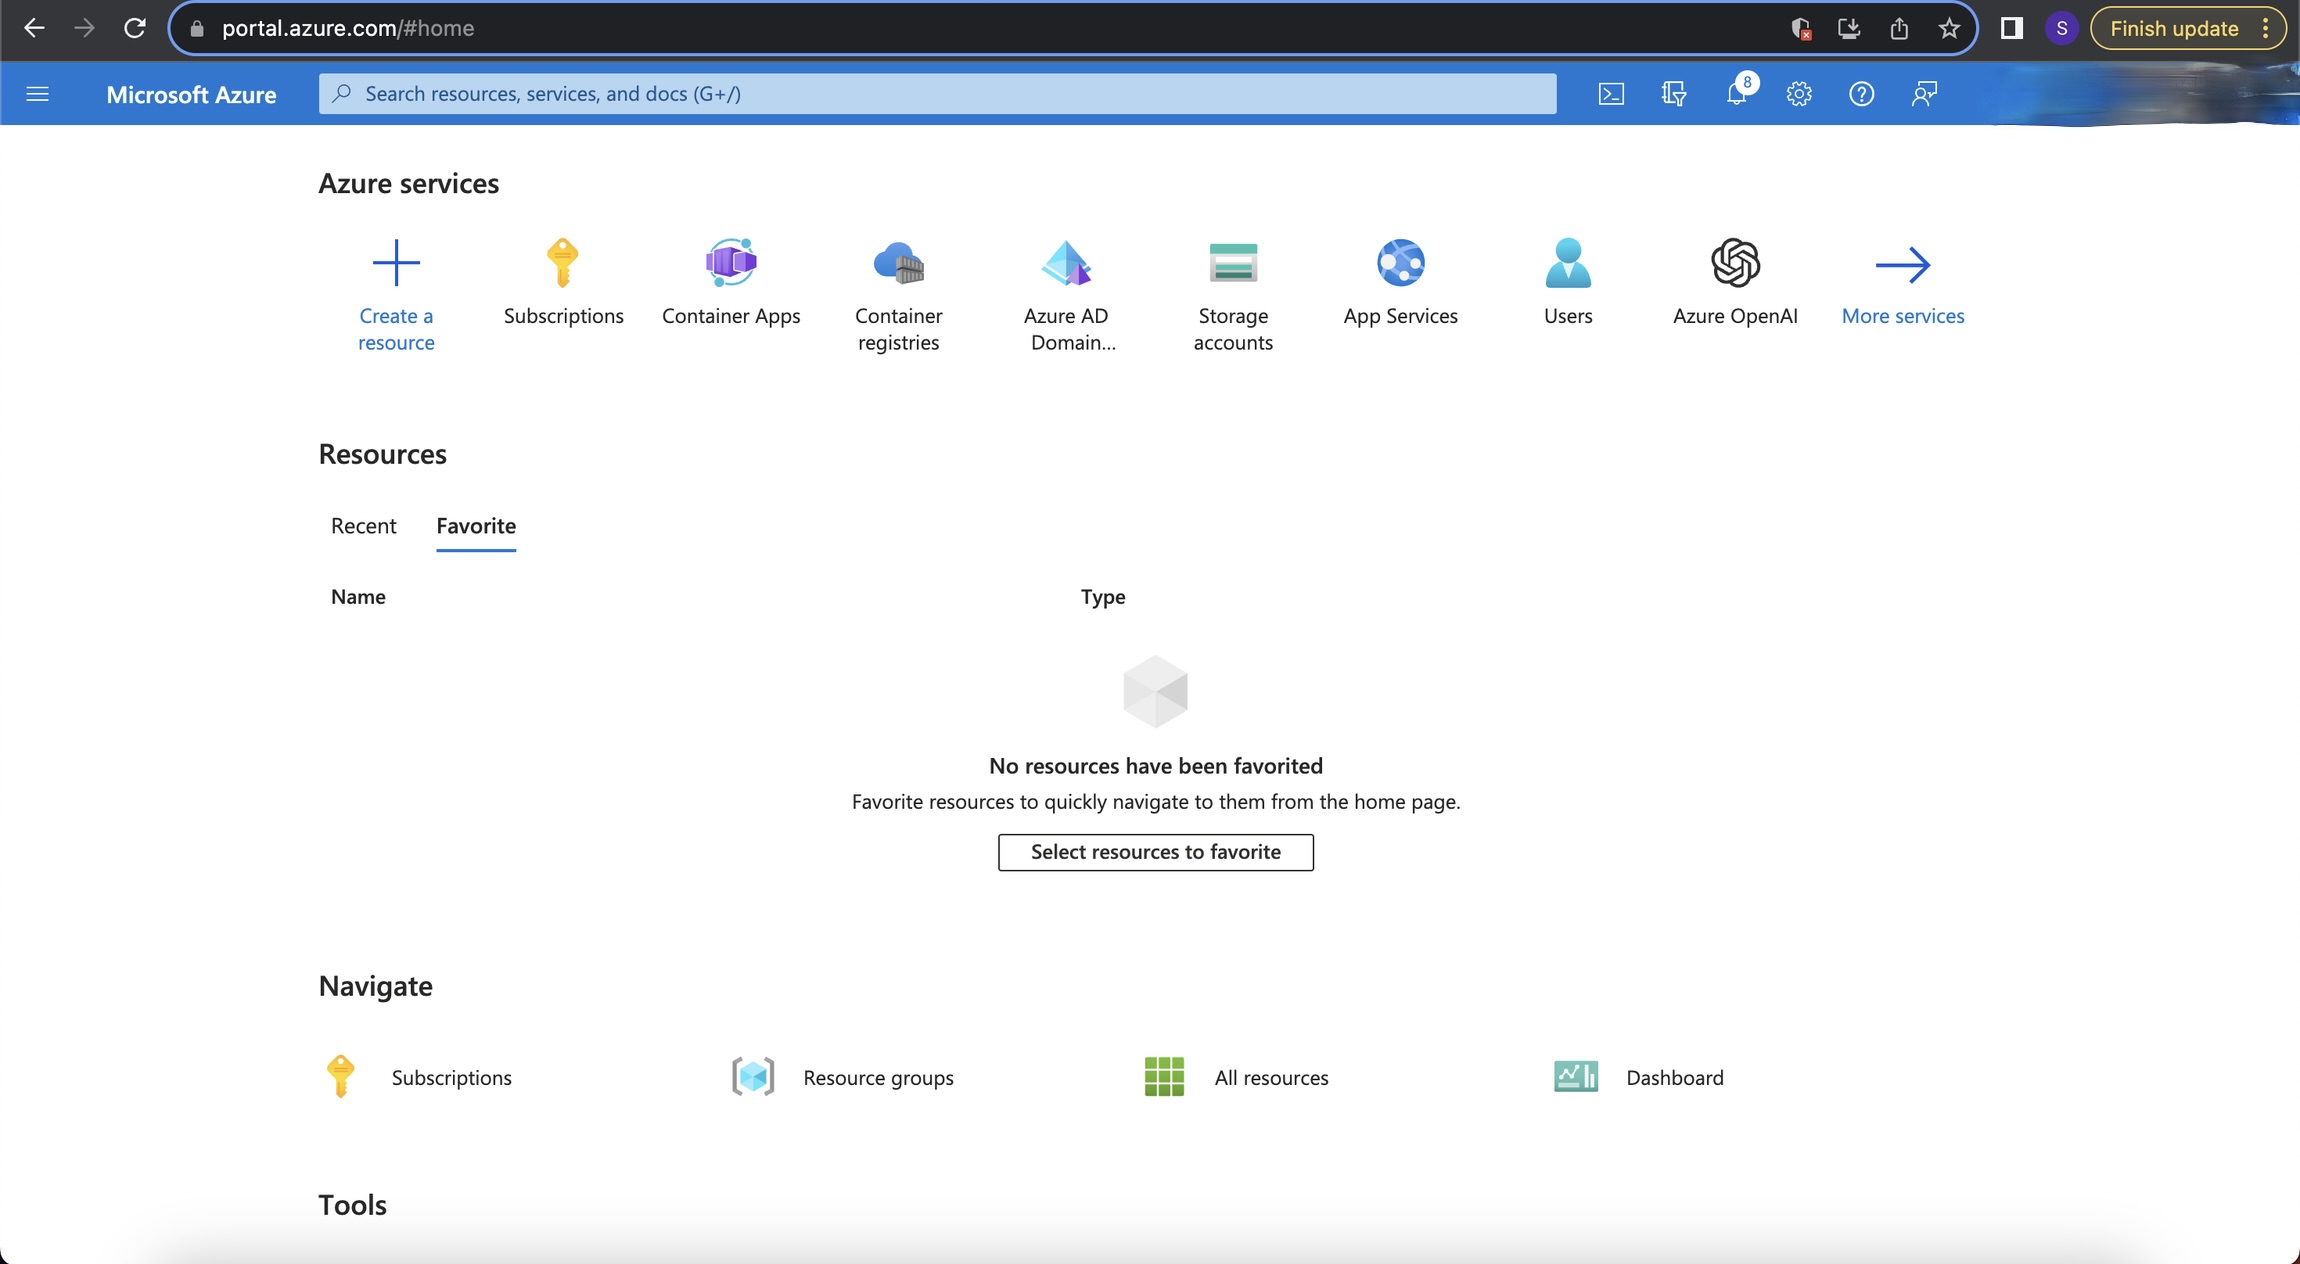 Azure landing page
Azure landing page
2. Create Your Container App:
Go through the creation process, filling out the necessary information like subscription, resource group, and the region.
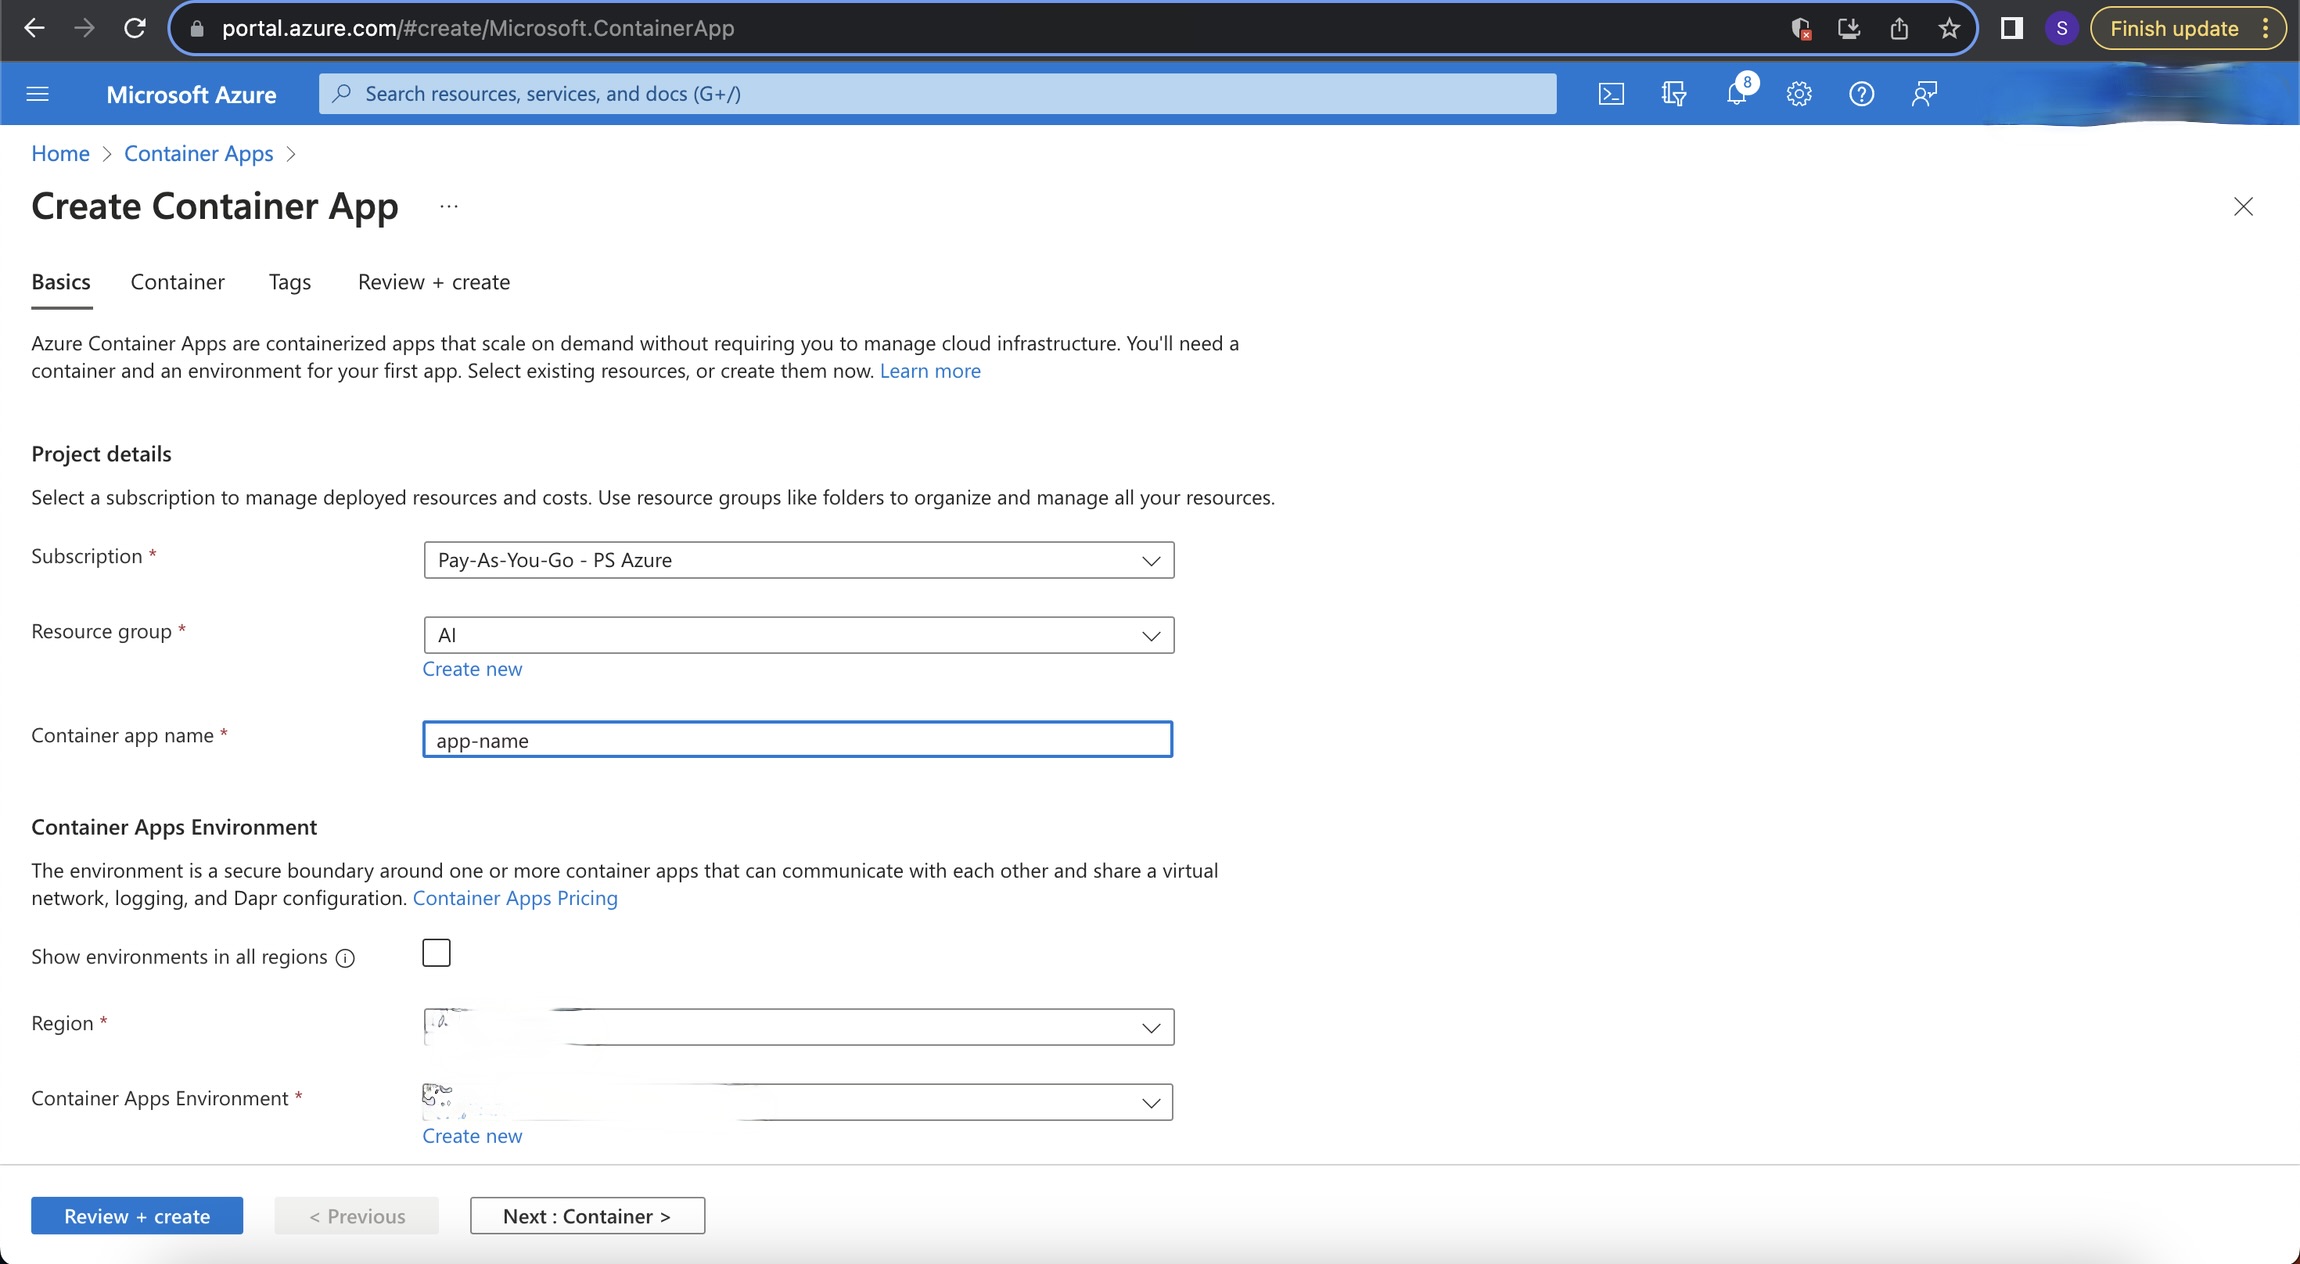 Container app creation
Container app creation
3. Configure the App:
Name your container and decide on configuration settings such as CPU, memory, and environment variables as needed.
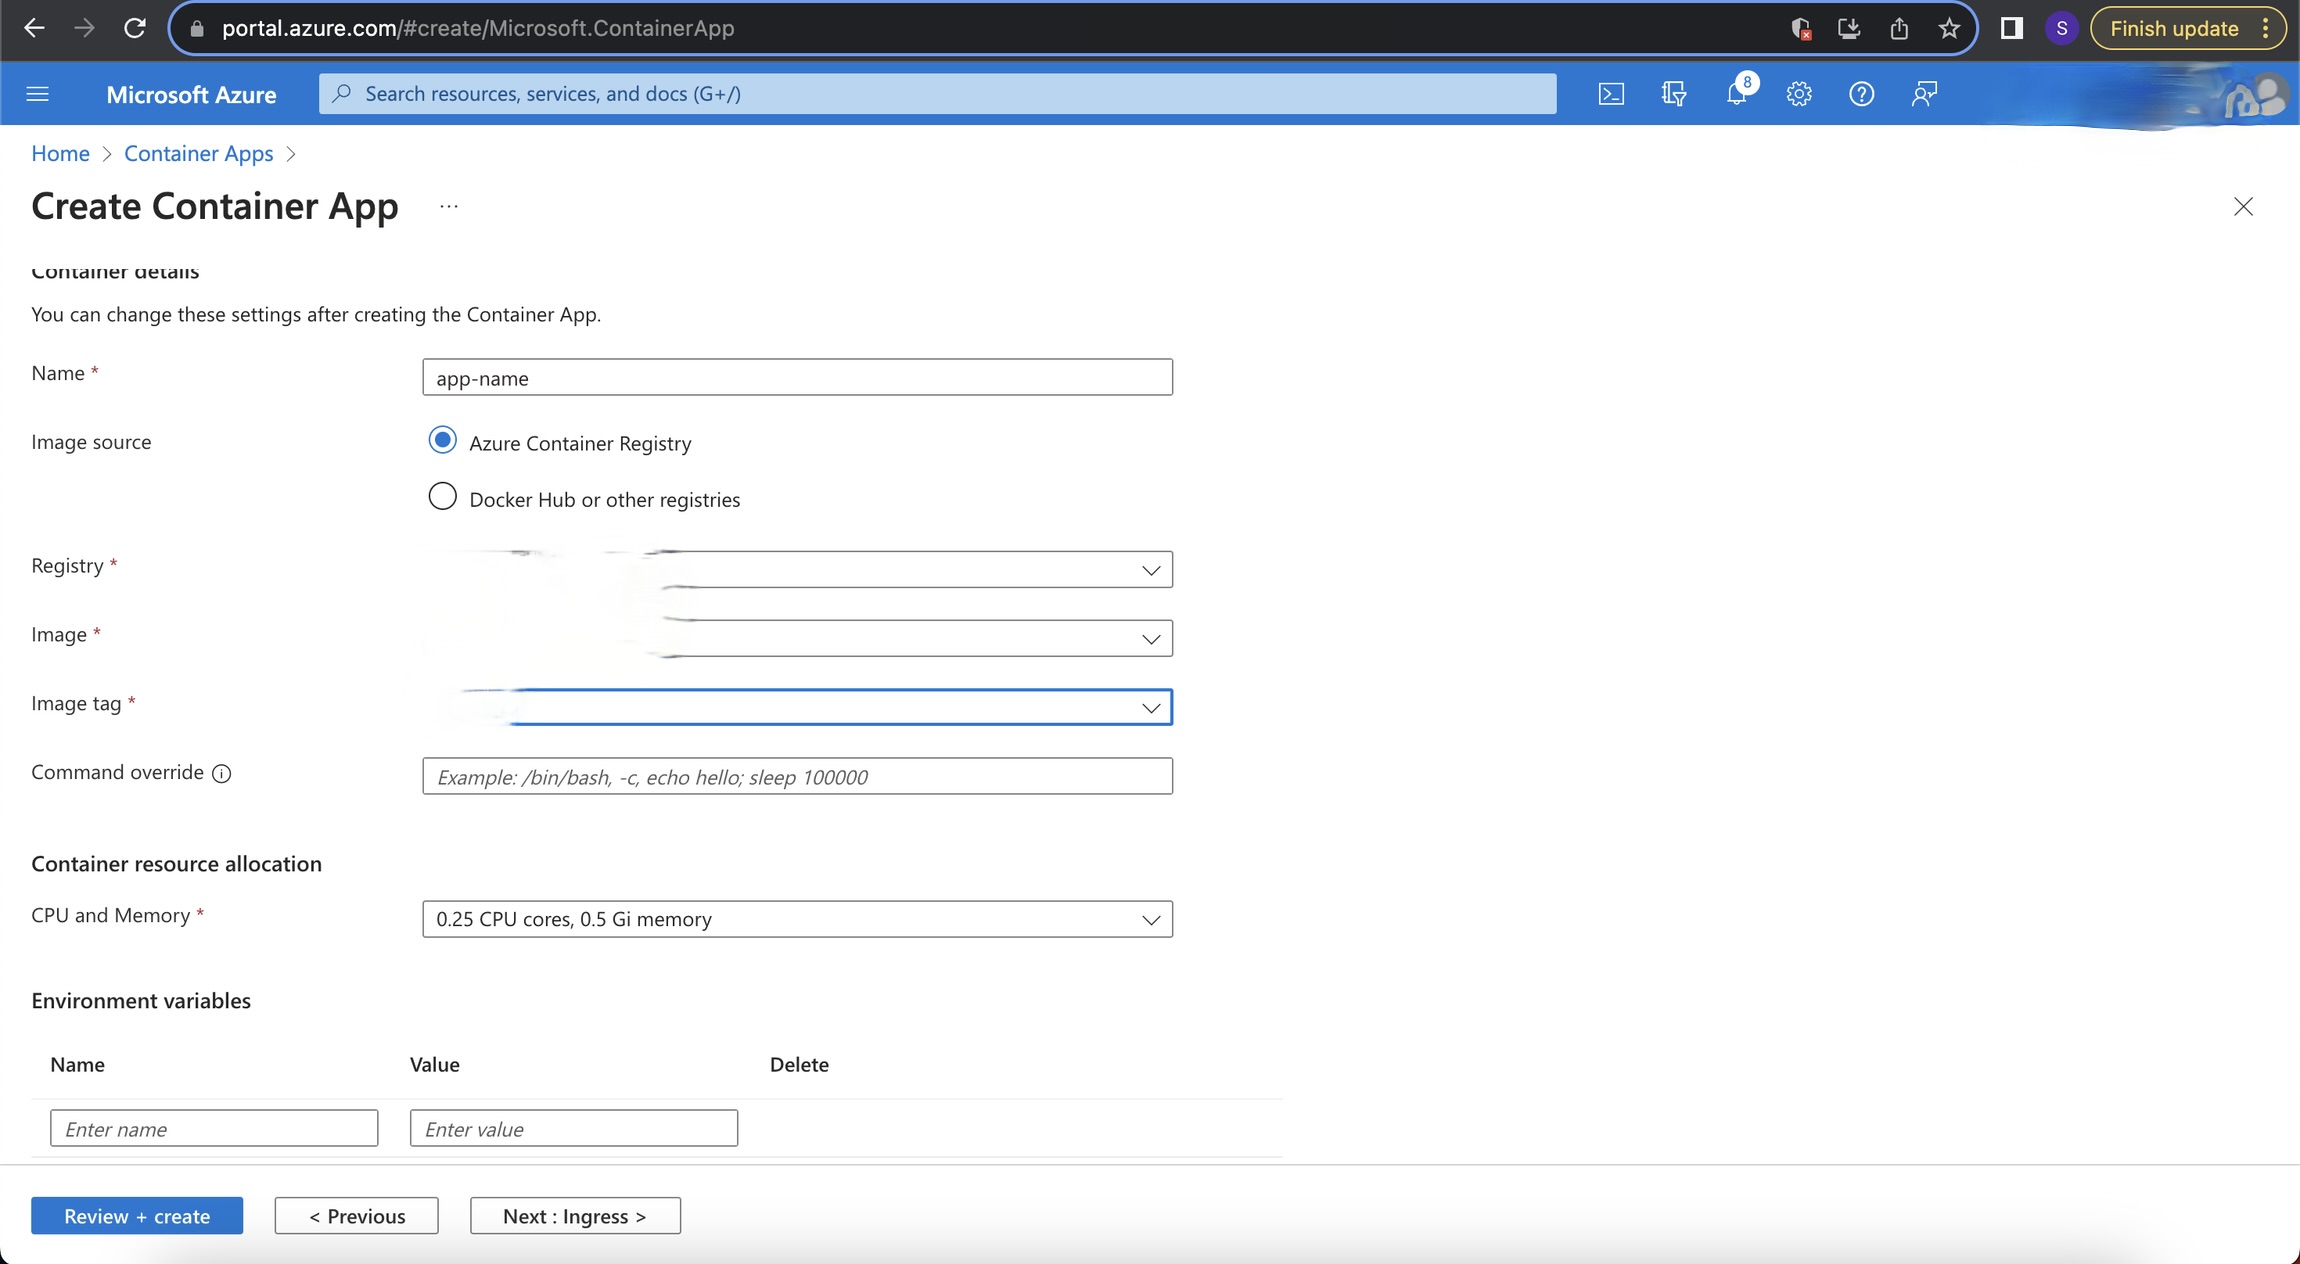 Container app configuration
Container app configuration
4. Ingress Settings:
Set up the ingress to control how your application is accessed externally. Enable the application and set the port configuration.
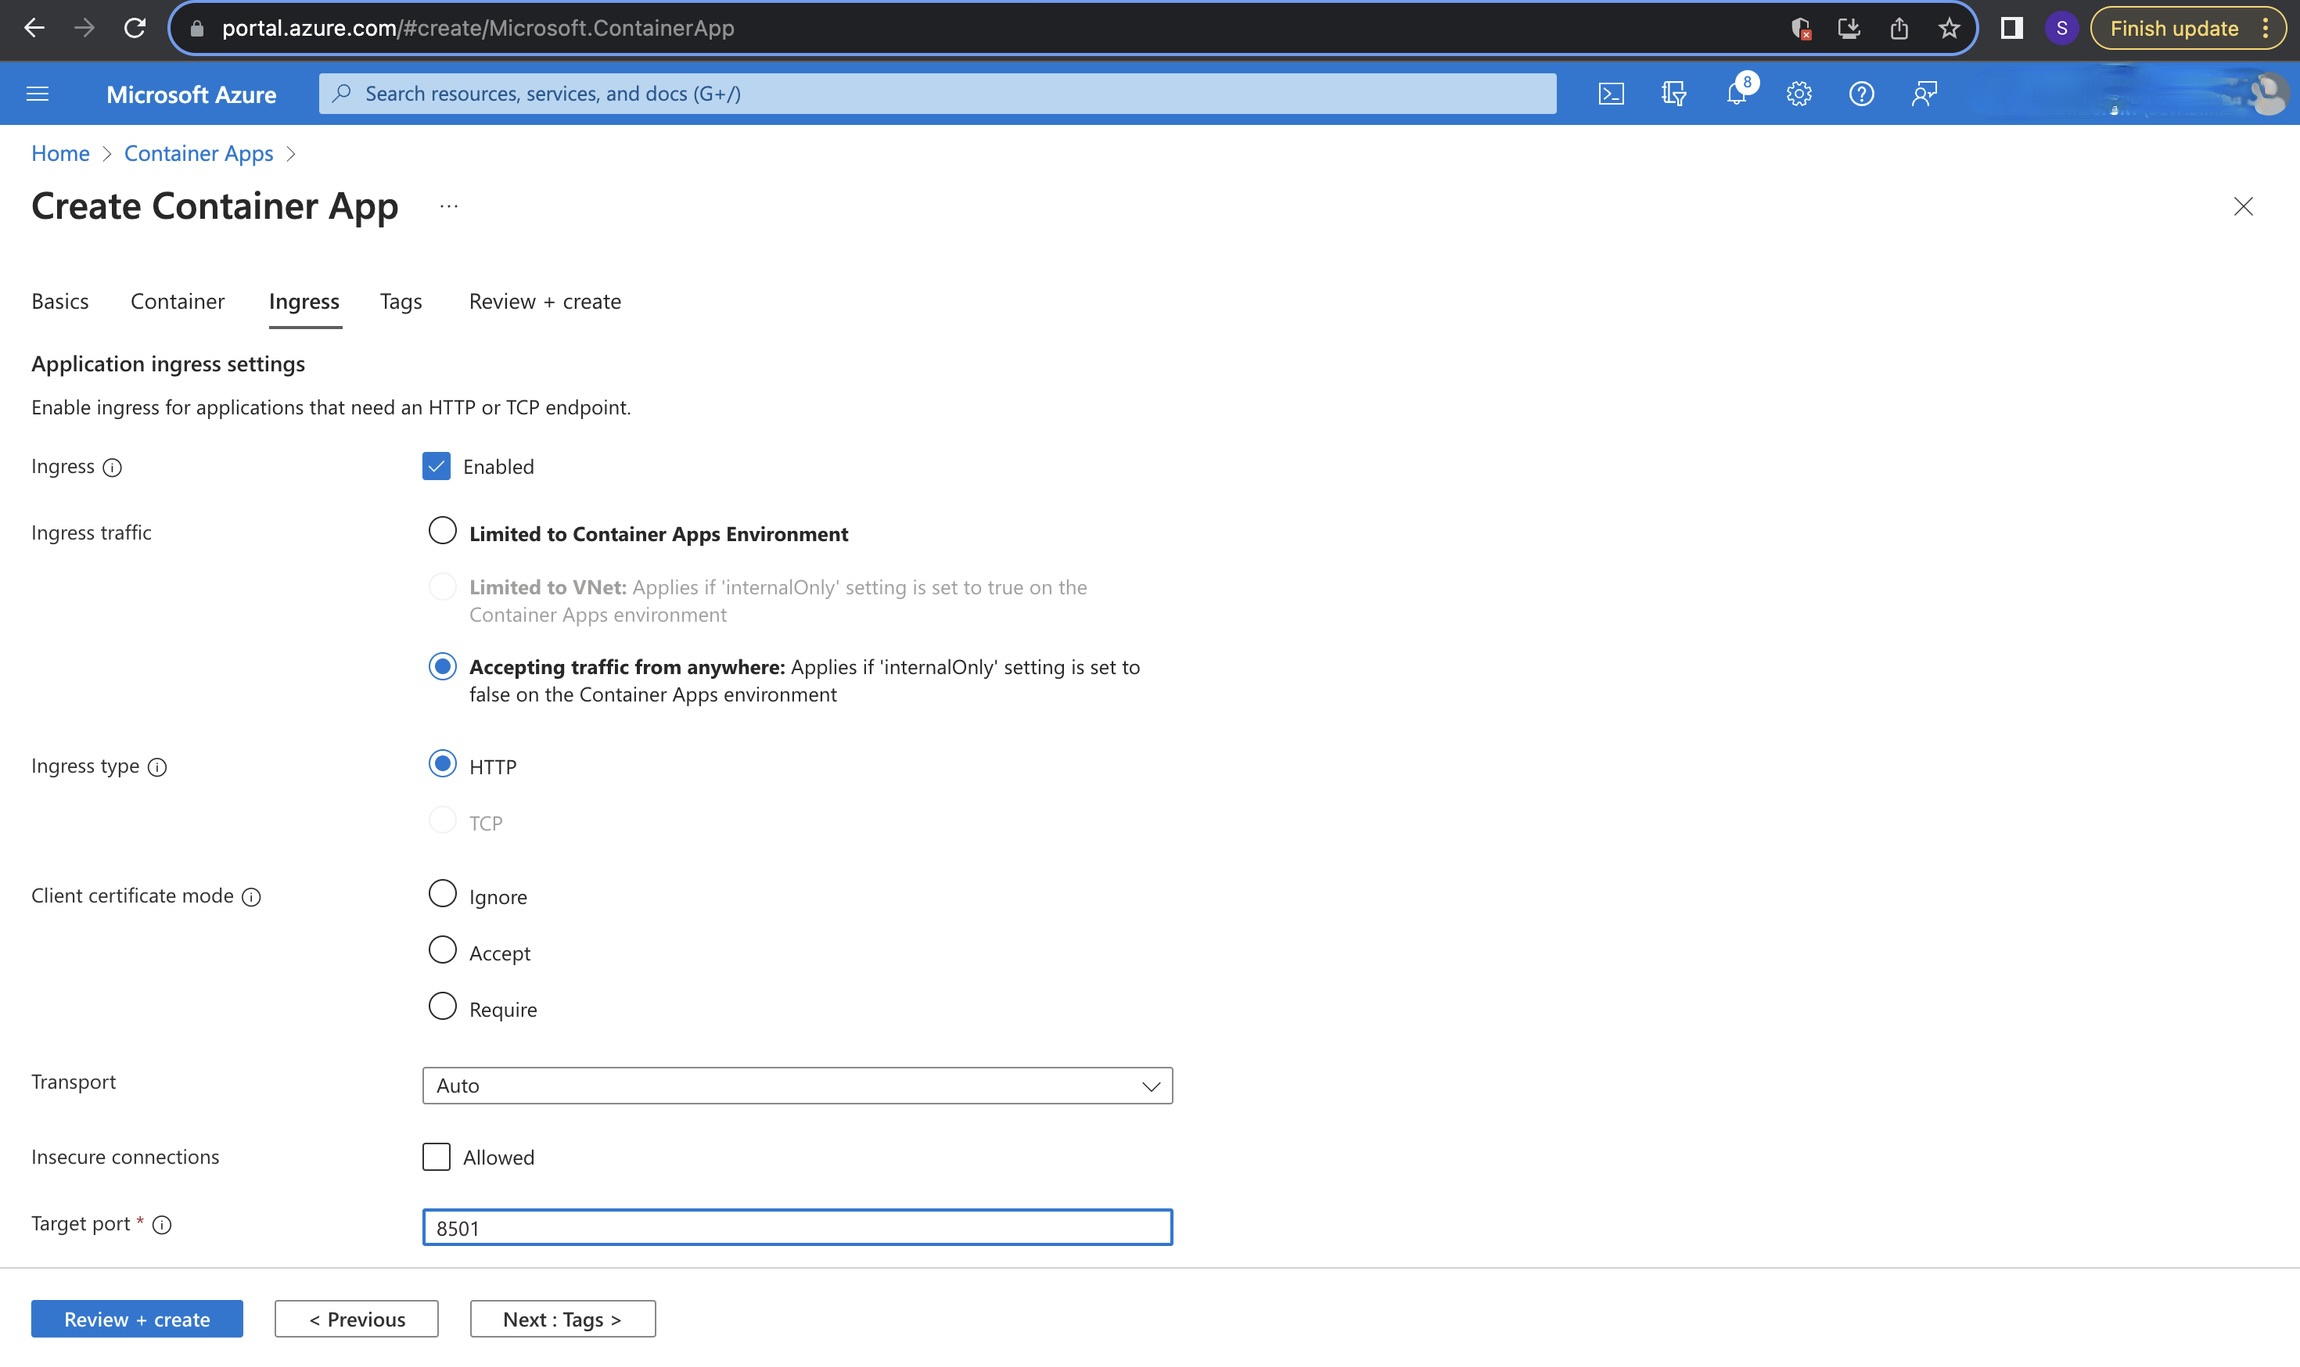 Container app ingress setting
Container app ingress setting
5. Review and Finalize:
Before deployment, review your settings. Look for the 'Validation passed' indicator and then hit 'Create'.
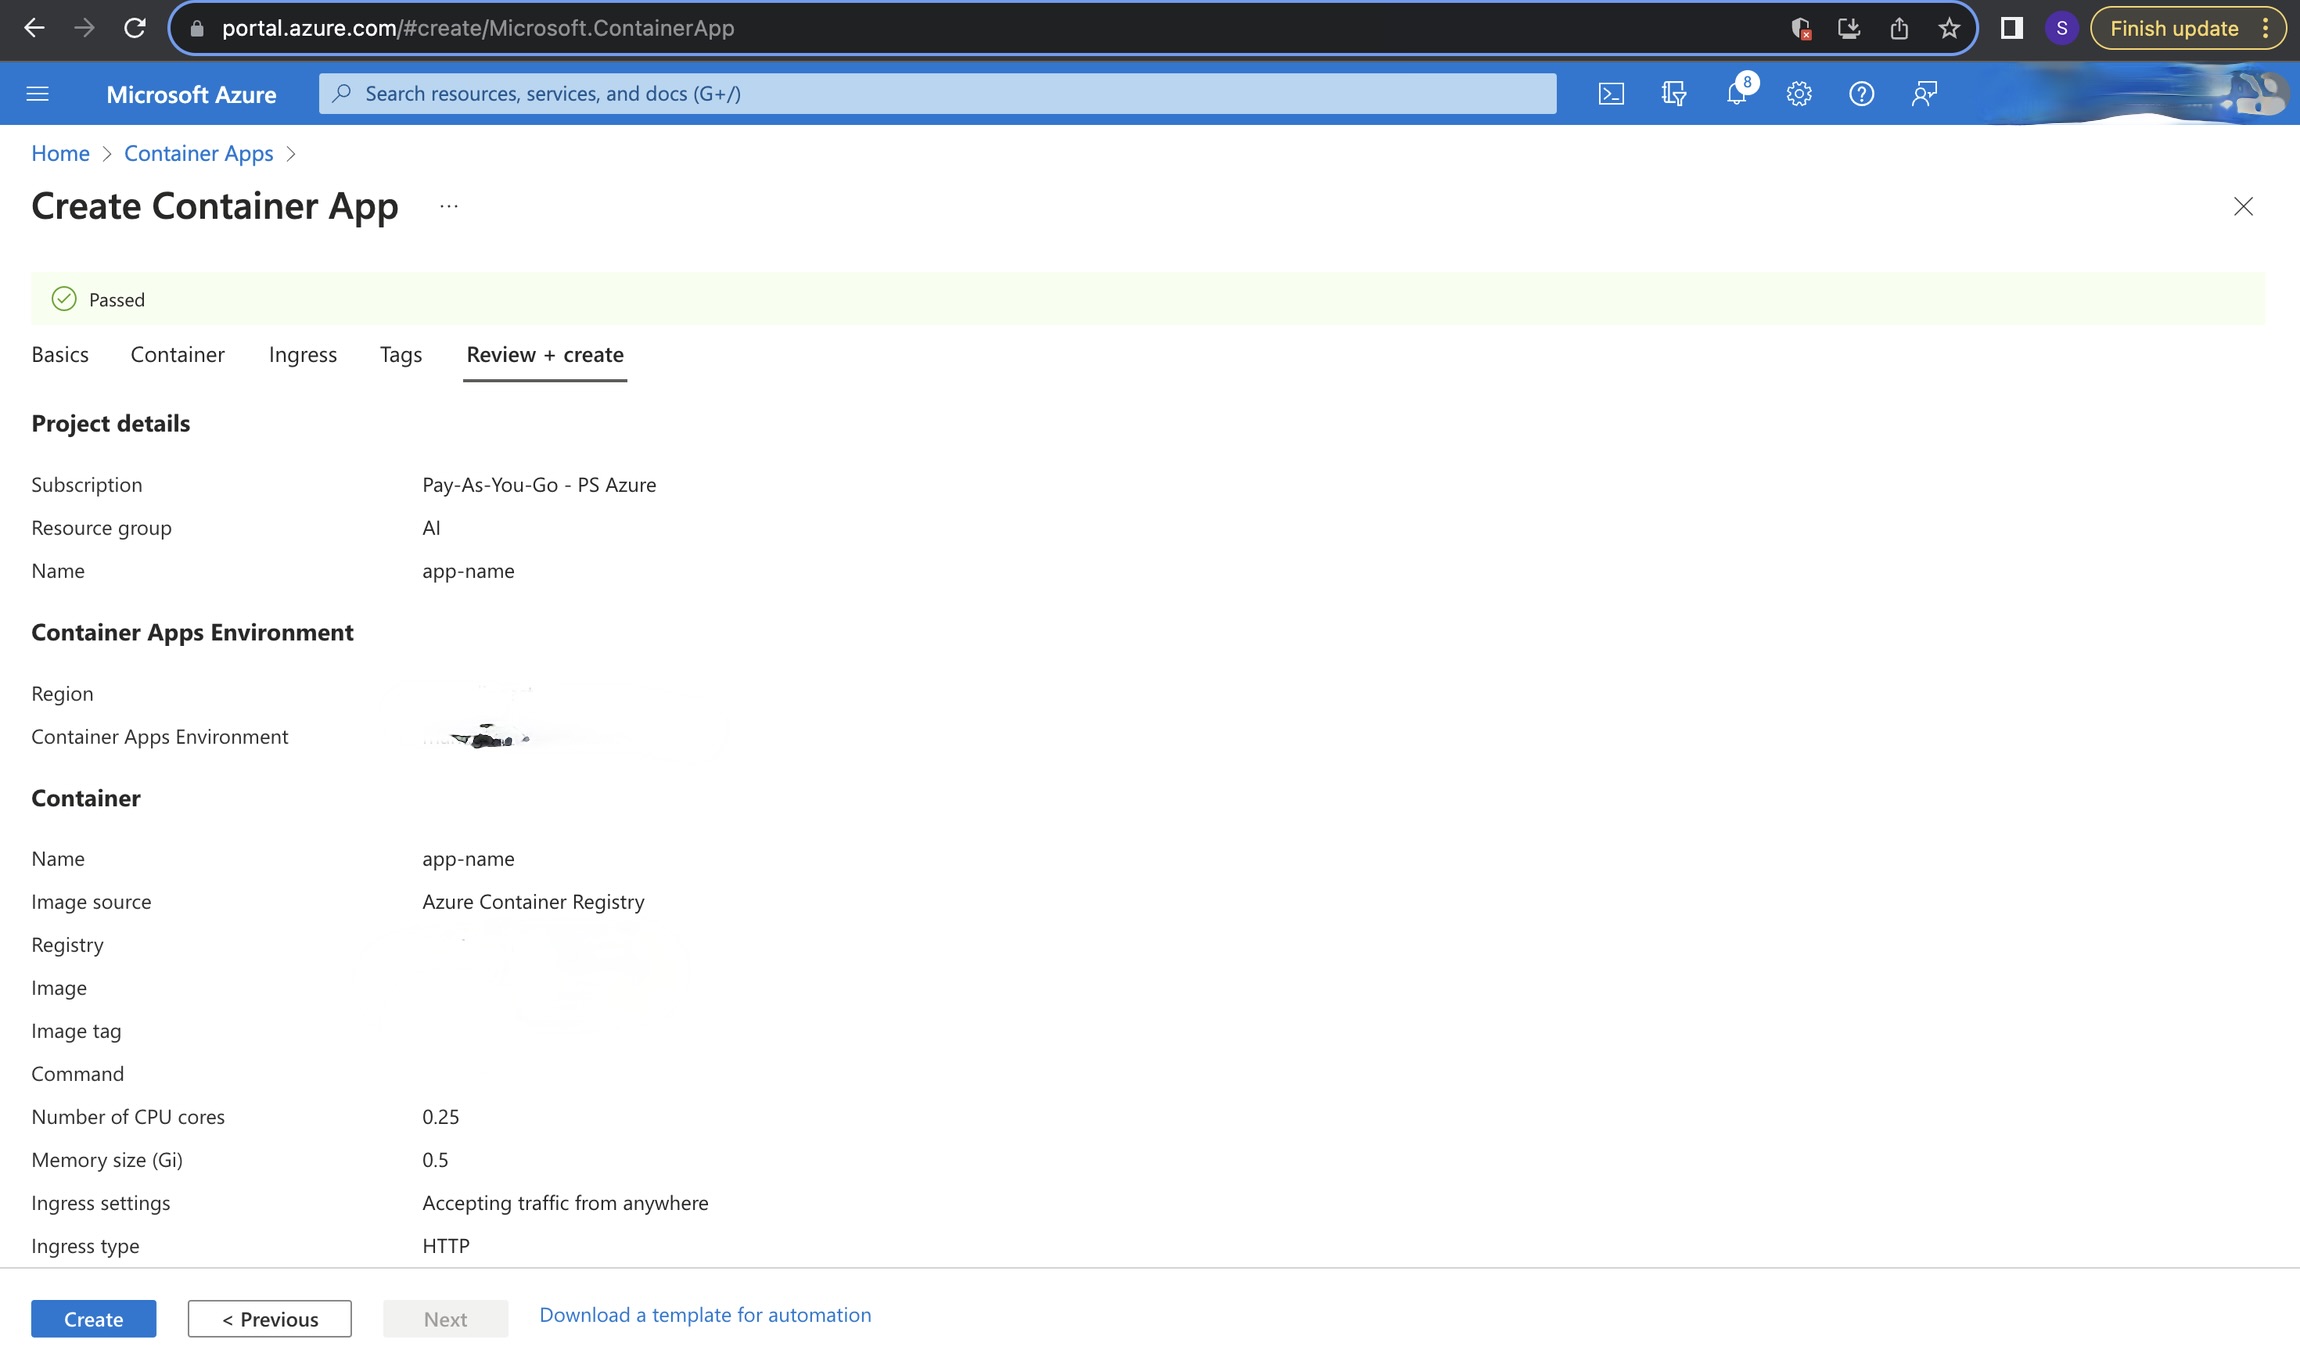 Review of configuration
Review of configuration
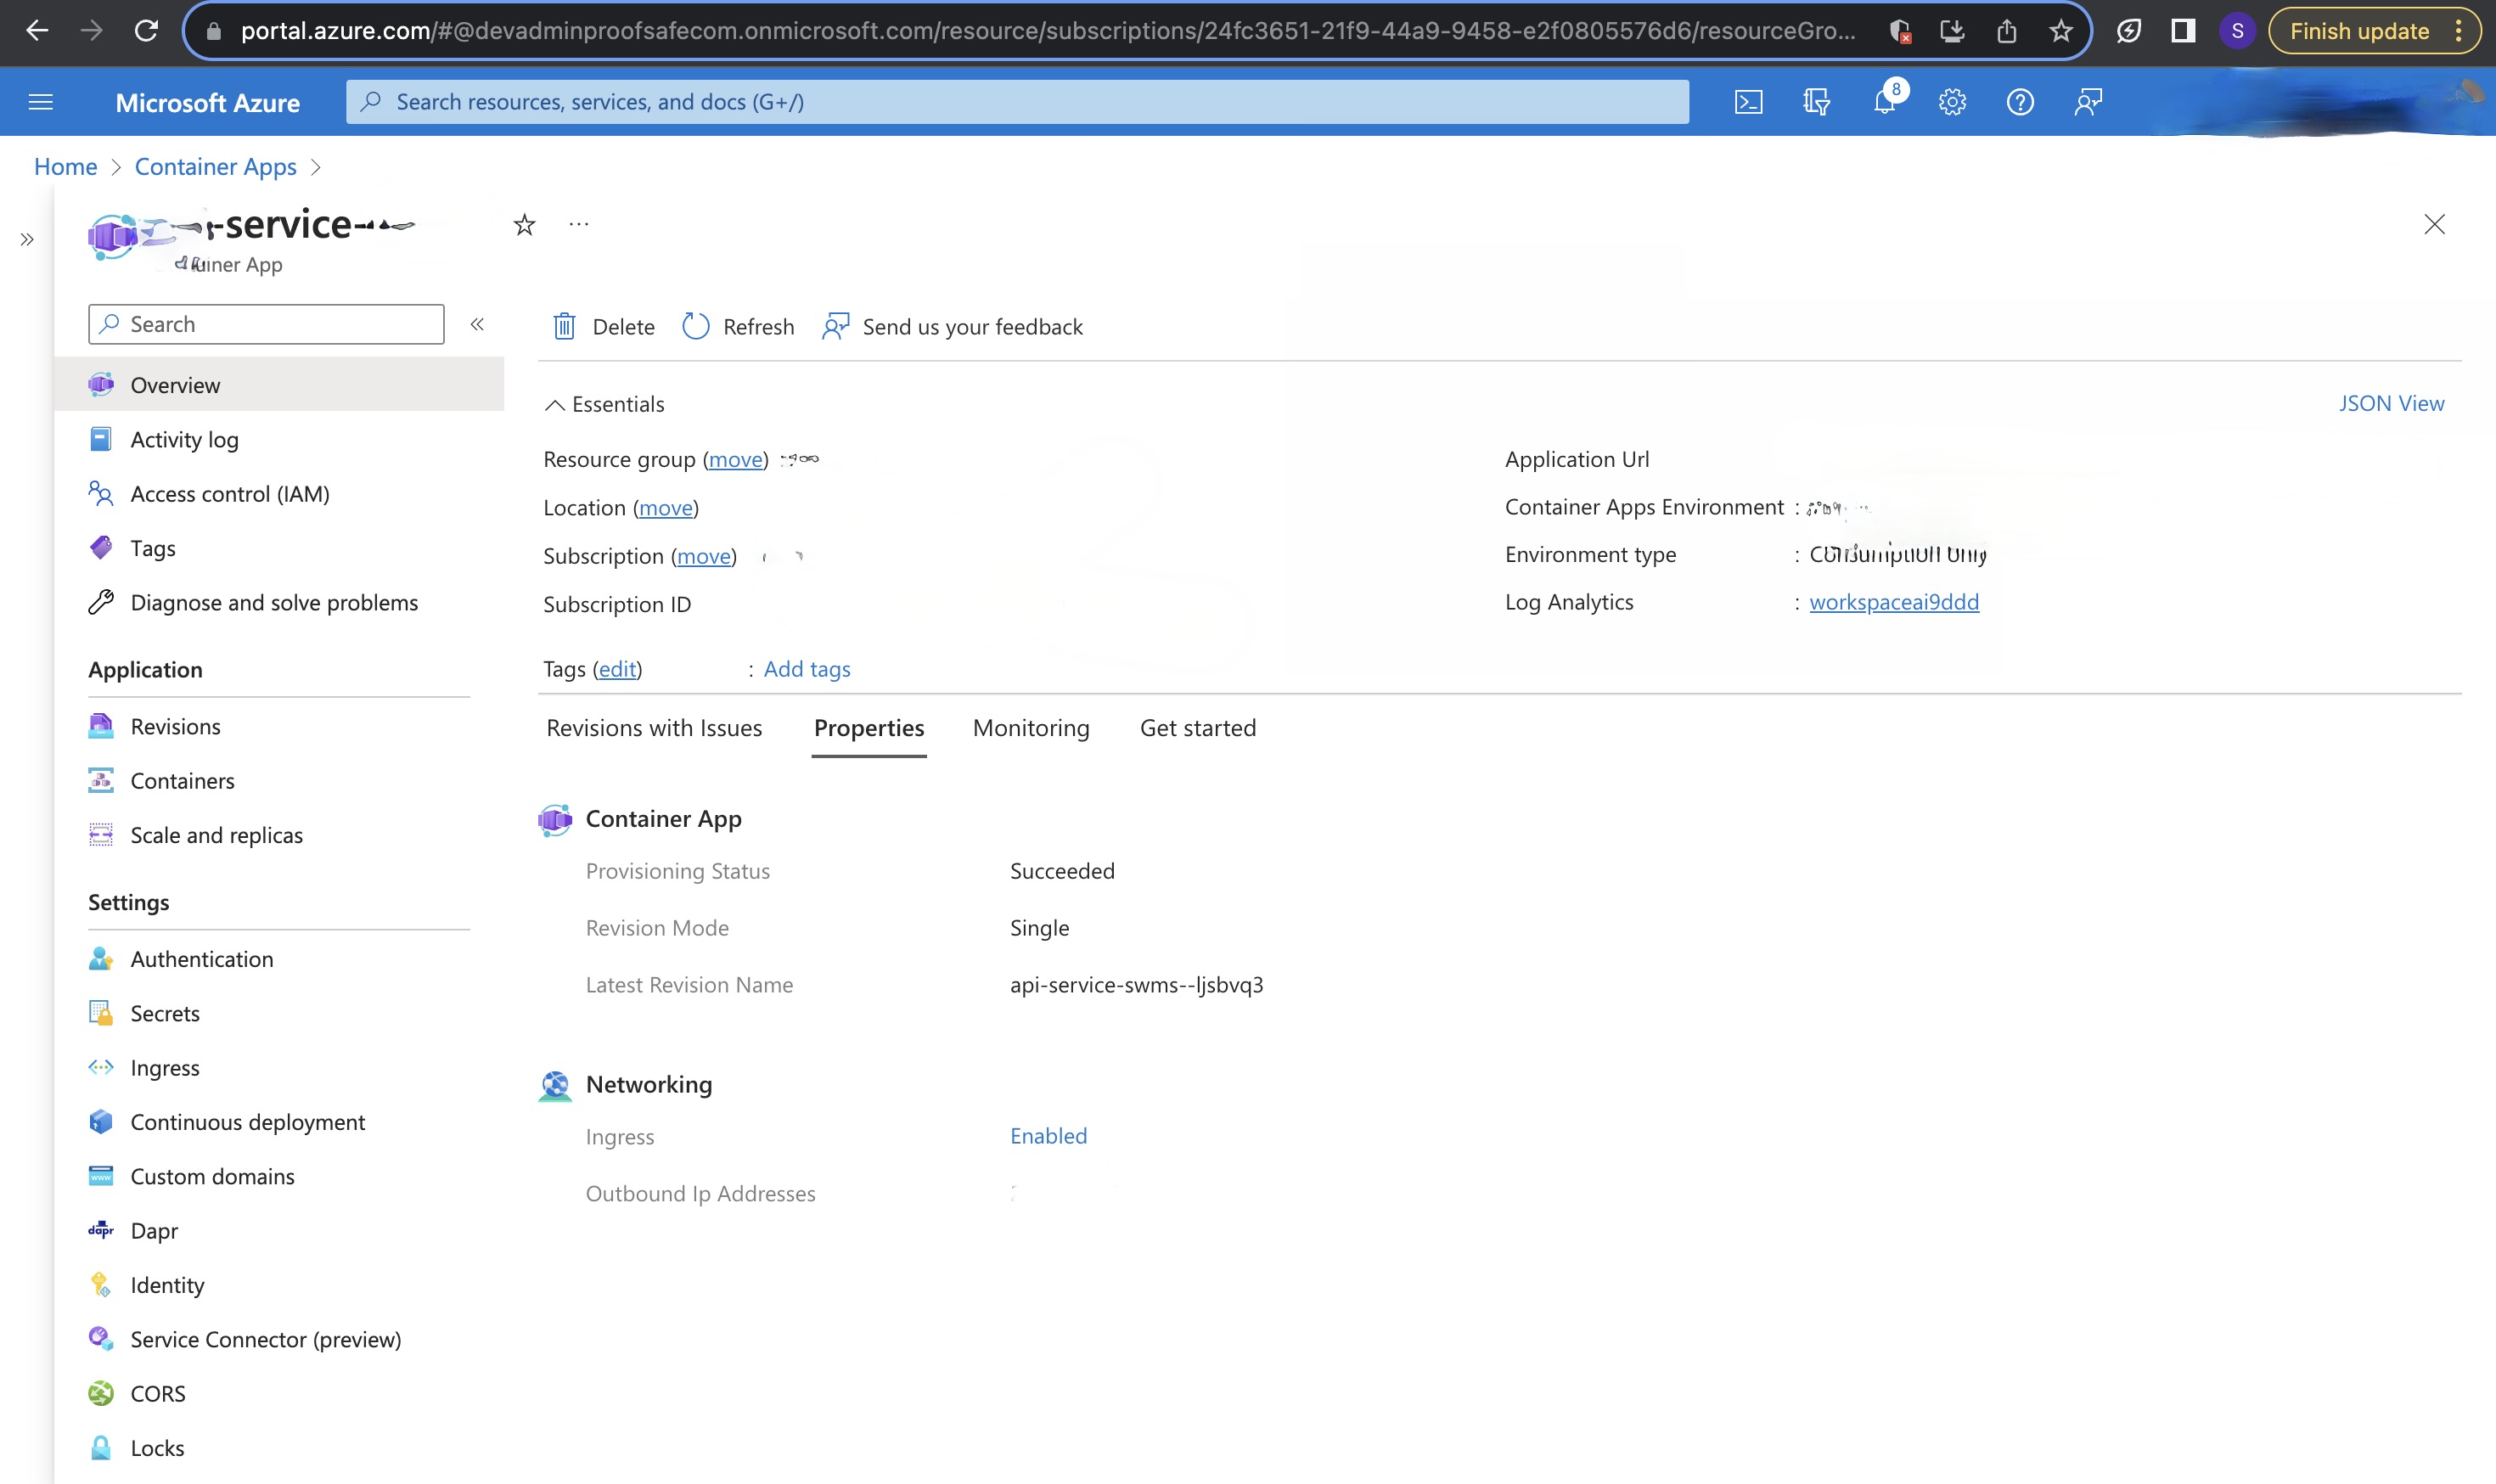
6. Access Your Deployed Application:
Post-deployment, your application will be accessible via the provided URL. Check your containers and manage settings from the 'Containers' section.
 Landing page of your deployed app
Landing page of your deployed app
Container Communication:
If microservices are deployed within a single application, each running in its own container, they can communicate with one another using http://localhost:<port> for inter-service communication, where <port> is the specific port number a given service listens on.
Conclusion
Your application is now successfully deployed in Azure, leveraging the power and flexibility of Azure Container Apps and ACR. With the ability to scale, manage revisions, and ensure your app is accessible over the internet, Azure Container Apps provide an excellent platform for modern app deployment.
Remember, this guide is a general approach and your specific use case might require additional steps or configurations.
Tags: